Working with the TestStand Simple User Interface - LabVIEW (TestStand 2013 and Previous)
Overview
Contents
- The TestStand User Interface Controls
- Exploring the Simple User Interface
- Customizing the Simple UI
- Further Reading
The TestStand User Interface Controls
Before exploring the TestStand Simple User Interface example, it is important to understand the functionality of the TestStand User Interface controls.
TestStand (as of version 3.0) includes a set of TestStand User Interface activeX controls designed make TestStand UI development easier. These controls allow you to create a user interface without the need to directly communicate with the TestStand API. Two types of controls are included in this set:
- Manager controls - Non-visible controls that manage the functionality of the user interface
- Visible Controls - controls which display information or allow user interaction
The sections below provide detail on the differences between these control types.
Manager Controls
Most of the functionality of the user interface is handled behind the scenes by three invisible controls known as manager controls. Each of these controls manages different aspects of TestStand (click links for help topic):
- Application Manager - handles general tasks such as logging users in, starting/stopping the TestStand engine, and launching new executions.
- SequenceFileView Manager - handles loading/unloading sequence files when they are not executing
- ExecutionView Manager - handles the progress of executions once they have started

In order to create a functioning TestStand User Interface, we need to do the following:
- link the manager controls to visible controls to make them functional
- configure how the manager controls handle various TestStand events
We will discuss how these tasks are accomplished in the next sections.
Visible Controls
The User Interface is comprised of visible controls which display information to the user and allow for user interaction. The following controls are available:
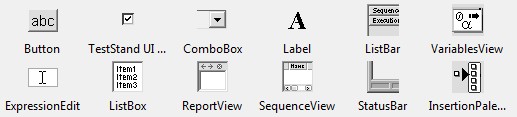
In order for these controls to function, they must be connected to a manager control. Once this connection is established, the manager controls handles all of the updating and user interaction processing automatically. The implementation of this connection is discussed in the TestStand Simple User Interface section
For information on the available controls, refer to the TestStand User Interface Controls topic in the TestStand Help.
Exploring the Simple User Interface
The following sections explore how the simple user interface example is built, discussing Each of the following phases:
- Connecting the Visible controls
- Configuring Callbacks to Handle TestStand Events
- Main Event Loop
- Shutting Down
Note: this interface is located at (<TestStand>\UserInterfaces\Simple\LabVIEW\Build Script.lvproj)
If you have never seen this interface, take a minute to run it and explore the functionality. Having the User Interface VI open while reading this guide will help in understanding.
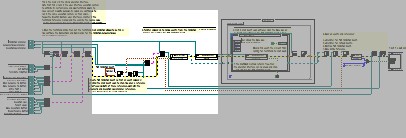
Connecting Visible Controls
The manager controls also handle the updating of the visible controls on the user interface, but the manager controls must be linked (connected) to the visible controls so they know what to update. This is the first phase of the user interface execution:
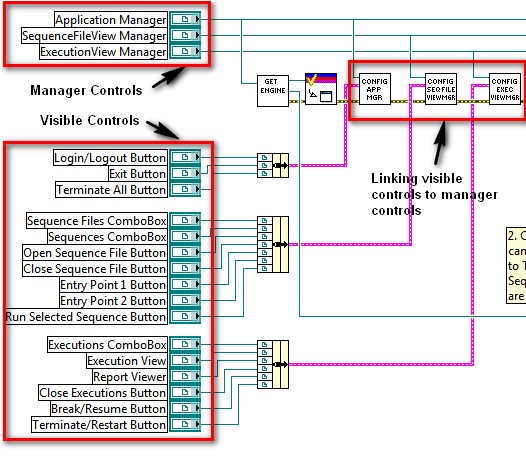
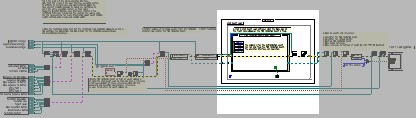
Configuring the visible controls
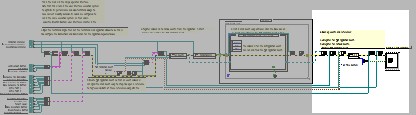
You can see that the visible controls are split into 3 categories based on which manager control is in charge of updating it. the control references are then passed into subVIs to make the connection. The diagram below shows the subVI where we configure the ExecutionView Manager.
Configuring execution related controls (Simple OI - Configure ExecutionViev Manager.vi)
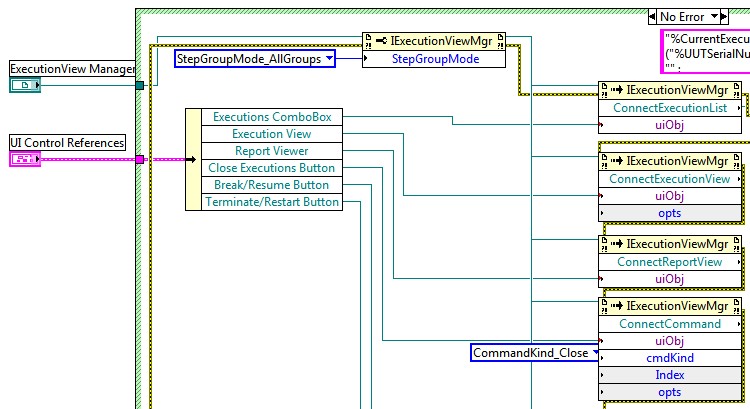
To make the connection, we call Connect methods of the manager control. For example, in the first invoke node, we tell the ExecutionView manager to display the execution list on our Executions Combo box by calling the ConnectExecutionList() method, and wiring in the control reference of the combo box.
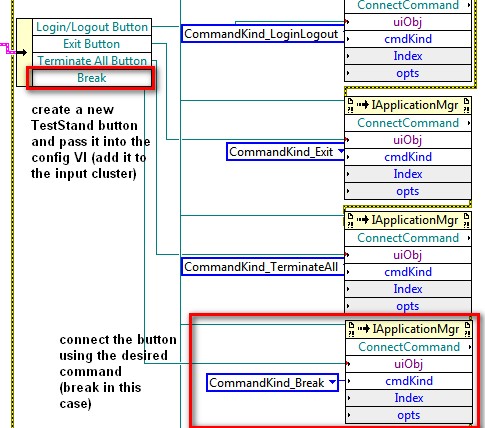
Rather than having a specific connect method for each button, the manager control implements the ConnectCommand method, which takes in both a control reference and a command. In the above code, we are configuring the Close executions button to execute the Close command when clicked. Each manager has particular set of Connect methods. Refer to the help topic on each manager (linked above) for a comprehensive list of connect methods.
For more information on how to connect each Visible control to a manager control, refer to the TestStand User Interface Controls topic in the TestStand Help.
This connection is all we need to do to make the controls functional.
Configuring Callbacks to Handle TestStand Events
The manager controls keep track a number of TestStand events, such as when an execution starts, or when you close the interface window. You can specify an action to take when an event occurs by specifying a VI to run when the event occurs. A VI that is executed in response to an event is known as an event callback (or usually simply callback). In the simple User Interface example, these callbacks are configured in the section below:
(NOTE: The simple UI uses a LabVIEW user event to exit the application. Refer to the User Events LabVIEW help topic for more if you aren't familiar with using these)
Configuring Event Callbacks

The Configure Event Callbacks subVI takes in a Manager Reference (each manager handles its own set of events) as well as a few additional items, which you will see are eventually used in the callback VIs. The code for the configure events VI is shown below:
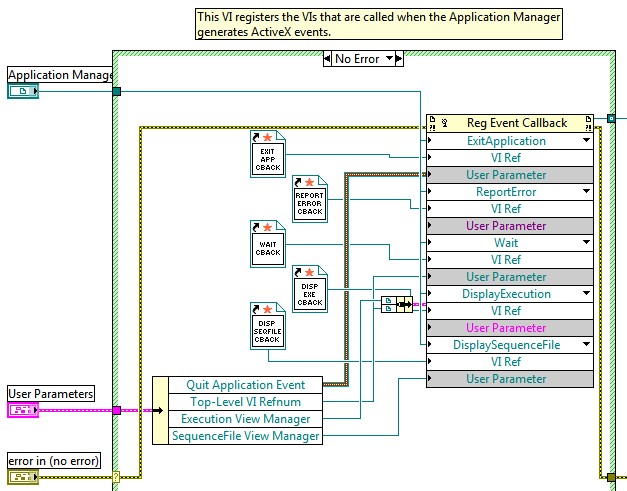
Inside the Register Event Callbacks subVI
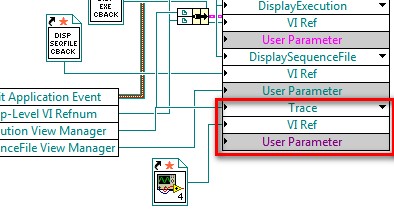
Configuring the event handling callbacks is accomplished using the Register Event Callback Node. This node allows you to select events of an activeX or .NET object (in our case the Application Manager control), and specify callback VIs to execute when the selected event occurs. The node has three terminals for each event:
- Reference to the event source - the object defining the event. In this case, the Application Manager control.
- Reference of the callback VI - a static reference to a VI to call when the selected event occurs. The VI must be configured correctly. NOTE: callback VIs can be created easily by right clicking the terminal, then selecting create callback VI.
- User parameter - Pass in any data you want to access in the callback VI that is not specified by the event data (you can see what is available in the event data by inspecting the callback VI). Since LabVIEW is not calling the VI directly, you cannot pass data through the connecter pane.
In the simple user interface, we configure callback VIs for 5 events, such as exiting the application and handling TestStand errors.
Note: the events we can track in TestStand are documented in the help topic for each manager in the Events section. The LabVIEW context help also provides a description of the events.
Shown below is one of the callback VIs, the Display Sequence File Callback, which is executed when we open a sequence file:
Display Sequence File callback subVI
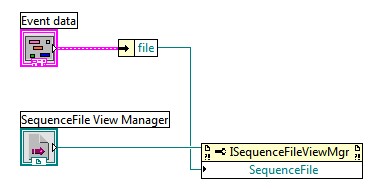
In this callback, we get a reference to the opened sequence file from the event data (a parameter containing information about how the event was triggered), and assign it as the active sequence with the SequenceFileView manager (we passed this reference through the User Parameter, since it is not included in the event data). This assignment causes the sequence view control to update and display the sequence file (we connected the sequence view control to the sequenceFileView manager as discussed previously).
Note that the exit application event callback is passed a reference to the "quit application" LabVIEW user event. this event is fired within the callback, and is later handled by an event structure, as we will see in the next section.
Main Event Loop
Now that we have configured the connections and events, the interface uses an event structure to wait for user interaction. Almost all user interaction is handled by a connection (clicking buttons, selecting items in combo boxes, etc.) or by a application manager event (loading a sequence, showing executions, etc). However, the manager controls cannot handle the panel close event, so we use a LabVIEW event structure for this purpose:
main event loop
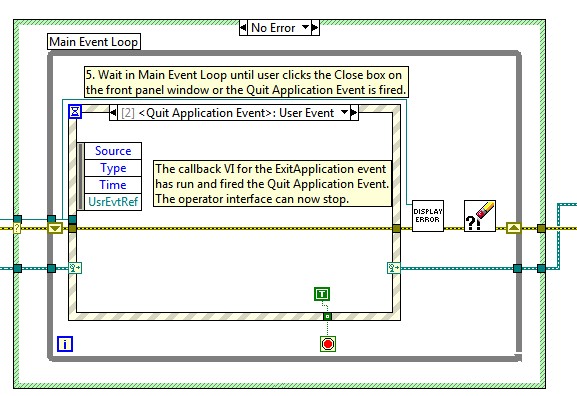
The event structure also handles the LabVIEW user event mentioned earlier. Both events have the same result: ending the main event loop so that the application proceeds to the shutdown phase.
Shutting Down
The final portion of the interface ensures that all references used are closed properly before exiting the application:
Closing necessary references.
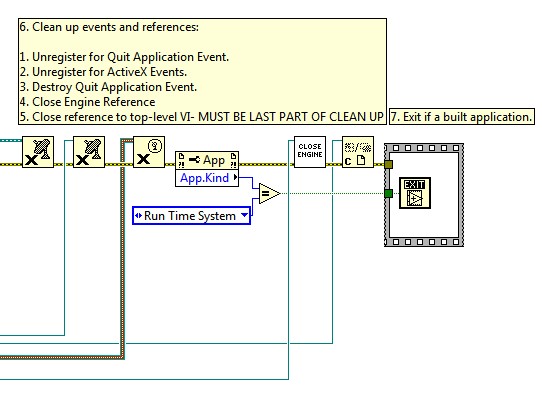
Shutdown consists of unregistering all LabVIEW events, closing the engine reference, and finally, exiting LabVIEW (in the case that we are running an EXE).
Customizing the Simple UI
Note: Before making any changes to the User Interface, copy all files from (<TestStand>\UserInterfaces\Simple\LabVIEW\Build Script.lvproj) into the corresponding <TestStand Public> folder location. make changes only to the copy in the TestStand public directory
Now that you have a better understanding of how the simple UI works, you may want to add functionality to the interface. Common customizations are discussed in the following sections.
Adding new TestStand Controls
If you create additional TestStand controls, you can easily make them functional by linking them to a manager control with a connection method. Refer to the TestStand help topics on each of the manager controls to see what connections are available
Handling Additional Events
If you want to do an action when a particular TestStand event occurs, you can do so by modifying the Register Event Callback node in the Register Events VI. To do so, expand the Register Event Callback node and configure the new event as described in the Inside the Register Event Callbacks subVI section
Common events to handle include:
- the Trace event (execution manager), which fires after each step executes when tracing is enabled),
- the UImessage event (application manager), which fires whenever a UImessage is posted. the message ID and data are accessible in the user parameters. for more information on using TestStand UI Messages, refer to Using TestStand User Interface Messages (UI Messages)
Adding LabVIEW Controls
If you want to add LabVIEW controls to the user interface, you can just add an additional case in the event structure to handle the event in the same manner as a typical LabVIEW application.
Further Reading
Now that you have an understanding of how a typical TestStand User Interface functions, consider exploring the full featured UI, which has the same basic structure, but has many more features. The full-featured UI is located here:
<TestStand>\UserInterfaces\Full-Featured\LabVIEW\Build Script.lvproj
Additional information on creating TestStand User Interfaces in LabVIEW is available in The Creating Custom User Interfaces topic of the TestStand Help
For Information on best practices for TestStand User Interface development, refer to Best Practices for NI TestStand User Interface Development, part of the NI TestStand Advanced Architecture Series