Archived: Uninstall or Repair NI Software or Drivers in Windows

NI does not actively maintain this document.

This content provides support for older products and technology, so you may notice outdated links or obsolete information about operating systems or other relevant products.

Overview

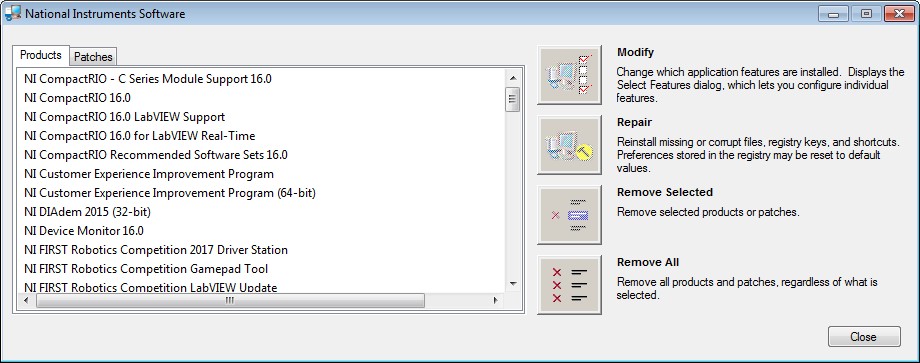
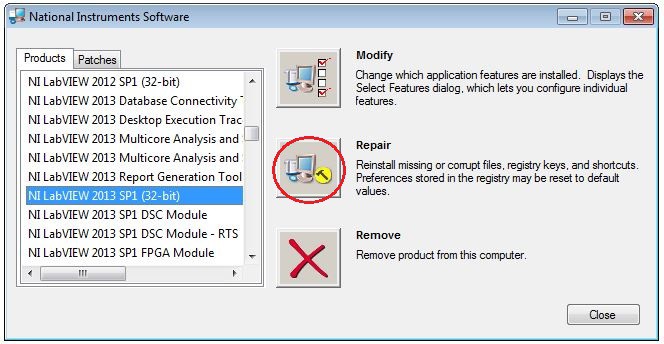
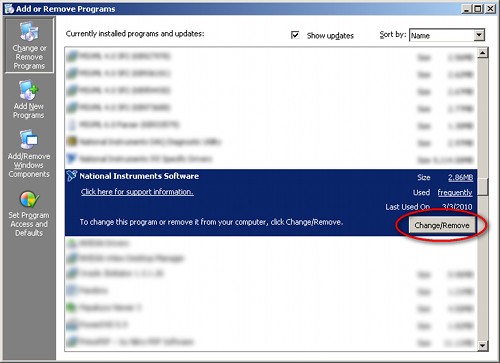
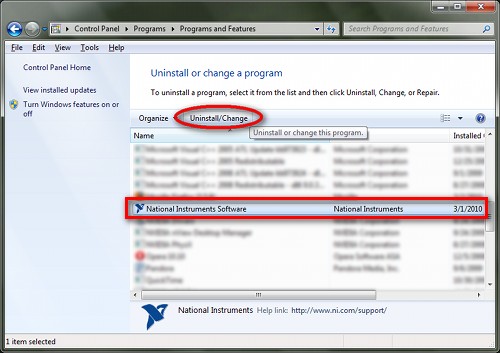
Repairing software can be useful if your product is not functioning correctly. The Windows Add/Remove software dialog gives users access to both Uninstall and Repair.


This article provides the correct procedure to uninstall or repair NI software Application Development Environment (ADEs), toolkits, modules, and drivers under Windows XP, Windows Vista, Windows 7, and Windows 10 if they were installed using stand-alone Windows installers. Note that screenshots in the steps below are from various Windows enviroments and your experience may look slightly different depending on your OS.


Note: NI has moved to primarily distributing software using NI Package Manager (NIPM); these steps are not applicable for software installed using NIPM. Follow the steps in this article if you installed software using stand-alone Windows and not NI Package Manager (NIPM).  If you have installed software using NIPM, please use this article instead. If you are unsure which method you are using, please continue below and review at step 6.

Contents

Introduction

The following steps document the correct procedure to repair or uninstall NI software products under Windows XP, Windows Vista, or Windows 7.

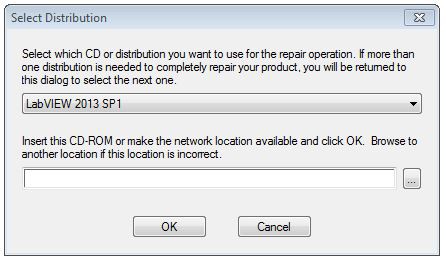
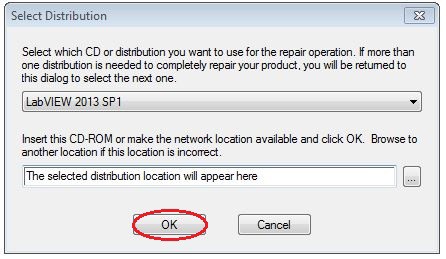
Note:
Performing a repair installation of any NI software product will reinstall any missing or corrupt files, registry keys, or shortcuts. Any preferences stored in the registry may be reset to default values, so take note of any custom program settings you may have configured.

Steps to Uninstall or Repair

  1. Ensure that any NI software products are closed.
  2. Open the Windows Control Panel.
  3. Manage your programs:
    • If you are using Windows XP, select Add or Remove Programs.
    • If you are using Windows Vista or Windows 7, open the Software category and select Programs and Features. Make sure you have administrative privileges on the computer, otherwise you may not have permission to access the program list, or make changes to it.
  4. Select the National Instruments Software entry.
  5. If you are using Windows XP, click the Change/Remove button to launch the NI Software configuration utility.


    If you are using Windows Vista or Windows 7, click the Uninstall/Change button located on the toolbar above the software list.


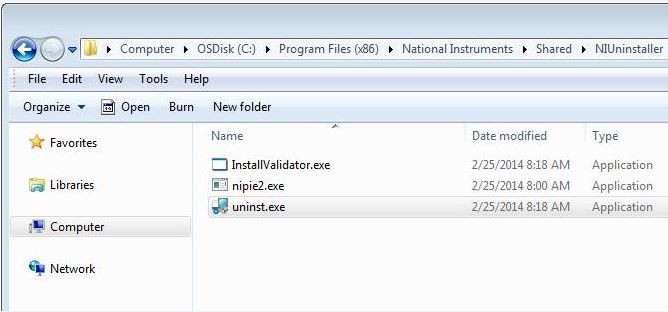
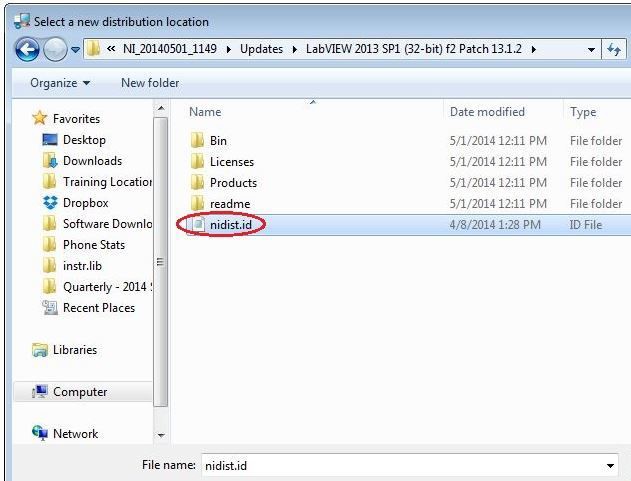
    Note: If you are not able to access your Add/Remove Programs list you can open the National Instruments Software window by manually launching uninst.exe from the following directory:

    <Program Files>\National Instruments\Shared\NIUninstaller


  6. If you are uninstalling the software product, select the desired software installation from the list and click Remove to begin the uninstall wizard and complete the removal process. If you are repairing the software product, proceed with step 7.

    If your pop-up dialog or window appears differently than below, you will likely need to follow the steps outlined in this article instead.


  7. Select the desired software installation from the list and click Repair.


    The installer will ask for the distribution (installation source) that the product was originally installed from.


  8. Browse to the distribution (usually your software DVD or the folder where your media was downloaded), and select the nidist.id or nisuite.xml file. Any NI installation media or distribution will contain an nidist.id or nisuite.xml file in its root directory.


  9. Once the file is Selected, click Open to return to the previous window.


  10. Click OK to proceed with the repair installation. If more than one distribution is required during the repair process, the Select Distribution dialog will be displayed more than once. The upper pane of the dialog will display the product whose distribution is needed. Repeat steps seven through nine for each required distribution.
  11. Reboot your computer when prompted to finish the repair installation.

Was this information helpful?

Yes

No