What is DAQExpress™?
DAQExpress is free companion software that is included with select NI data acquisition hardware, such as USB and PCI Express DAQ devices. This interactive software helps you view, record, and explore your data.
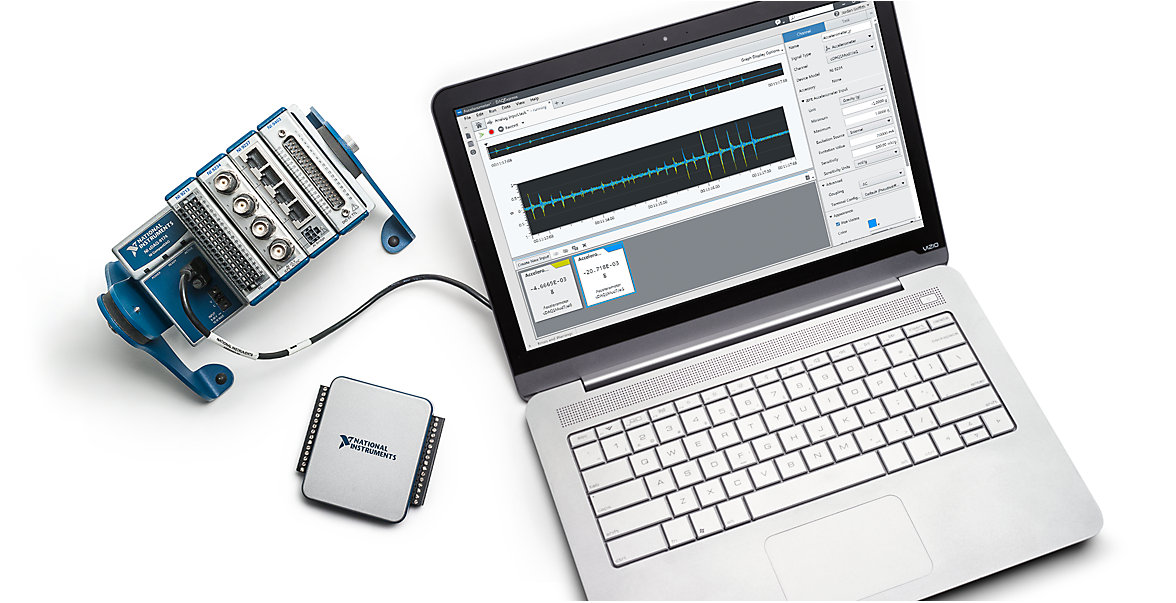
Quickly Visualize and Analyze Signals
Instantly visualize measurement data and analyze signals interactively to make decisions.
Capture Accurate Data With High-Quality Hardware
Save time with quick access to all the measurements your NI DAQ device supports. Instantly access all the sensor types or outputs available.
Be Confident in Your Wiring and Connections
Directly access hardware manual and pinout information to document and verify your wiring connections.
Select the Right Hardware to Meet Your Application Needs
Choose from a wide selection of hardware, ranging from low-cost devices to high-performance modular systems that match your application requirements and budget.
SEAMLESS SOFTWARE SOLUTION
Accurate Measurements for Smarter Decisions
DAQExpress helps you easily configure compatible measurement hardware, and view and analyze data using interactive analysis panels. Instantly capture measurement data without programming, or perform basic automation by creating a basic LabVIEW VI in the DAQExpress editor.
Key Benefits
Simplify Your Setup
Save time with quick, clear access to all the measurements your DAQ device supports as soon as you plug in.
Quickly Capture and Explore Data
Get instant access to the data you care about without having to spend time programming a system.
Confidently Make Decisions
Apply analysis to captured data with built-in interactive tools to rapidly make data-driven decisions.
Featured Content
Counters and Triggers Using DAQExpress
DAQExpress provides two ways to handle digital events so that you can quickly iterate your measurement setup to capture the right data.
Getting Started with DAQExpress
Learn how to start using NI DAQExpress software with your NI DAQ devices and how to move your existing applications from SignalExpress or other tools.
Analyze Datasets in DAQExpress
With DAQExpress you can interactively analyze data sets. In some cases, such as applying filters, you can also implement this analysis programmatically to automate or repeat the analysis you perform on measurement data.
SHOP FOR DEVICES
Shop by Measurement Type
CompactDAQ USB Chassis
cDAQ-9171
1‑Slot, USB CompactDAQ Chassis—The cDAQ‑9171 is a bus‑powered CompactDAQ USB chassis designed for small, portable sensor measurement systems.
cDAQ-9174
4‑Slot, USB CompactDAQ Chassis—The cDAQ‑9174 is a CompactDAQ USB chassis designed for small, portable sensor measurement systems.
cDAQ-9178
8‑Slot, USB CompactDAQ Chassis—The cDAQ‑9178 is a CompactDAQ USB chassis designed for small, portable sensor measurement systems.
cDAQ-9179
14‑Slot, USB 3.0 CompactDAQ Chassis—The cDAQ‑9179 is a CompactDAQ USB chassis designed for small, portable sensor measurement systems.
Students and Educators
myDAQ Student Device
The device combines a comprehensive set of plug-and-play computer-based lab instruments with portability for hands-on student learning in or outside the lab.