There are several items below to consider when configuring your server settings. If you encounter problems communicating with your volume license server, please review the VLM Troubleshooting Guide.
Configure NI VLM Ports
Change or unblock the ports on the server that hosts your National Instruments licenses and on end user computers if you are running other license servers on this computer or if you have a firewall enabled.
For VLM 3.0 and VLM 3.1
- Configuring NI VLM Ports
- Optionally, also review Configuring Communication Ports for NI VLM or FLEXnet Publisher
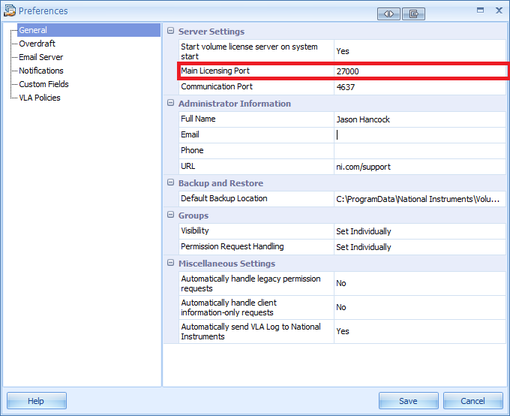
NI VLM 3.0 & 3.1 Preferences - Main Licensing Port
For VLM 2.1.1 and earlier
- Select the Options»Preferences menu item.
- Select the General tab.
- Enter the port you want to use in the License Server Port option. The default port number is 27000. Ports range from 1-64000, inclusive.
- Enter the port you want to use in the Background Process Port option. This port does not need to be changed unless you have a conflict or a firewall on the license server. The default port number is randomly selected by the license server and ranges from 1-64000, inclusive.
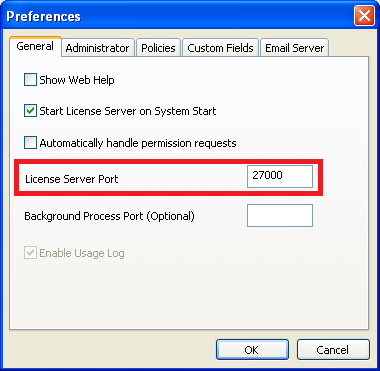
NI VLM 2.1.1 Preferences - Main Licensing Port
Enable the Usage Log
Enable or disable the usage log. The usage log contains usage information of NI VLM-controlled software, such as check-in and check-out events, along with relevant client information.
For VLM 3.1
- Select the Reports tab and choose the type of report you'd like to generate.
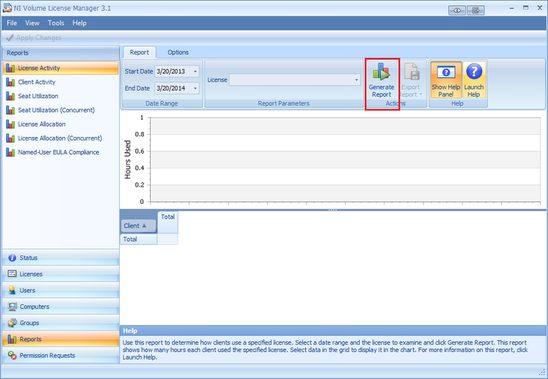
NI VLM 3.1 Reports Tab
For VLM 3.0
- Select the Tools»Preferences menu item.
- Select the General tab.
- Under Miscellaneous Settings, you have the option to Enable Usage Log. By default, this is enabled.
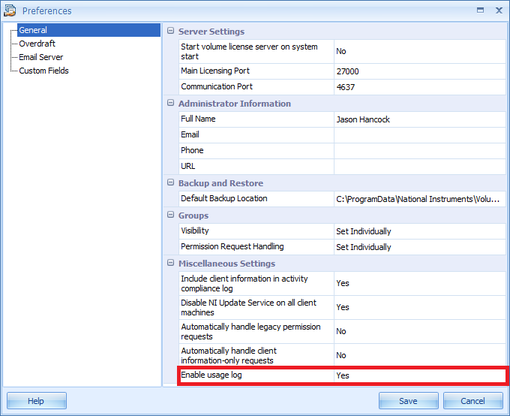
NI VLM 3.0 Preferences - Usage Log
For VLM 2.1.1 and earlier
- Select the Options»Preferences menu item.
- Select the General tab.
- Select the Enable Usage Log checkbox. (It will be disabled if the license file is expired.)
.png)
NI VLM 2.1.1 Preferences - Usage Log
Set Administrator Information
Enter administrator information, including name, phone, email, and URL. This information is included in any installers you create with the Create Volume License Installer wizard. The email address you specify here is used when you email disconnected licenses to end users.
For VLM 3.0 and VLM 3.1
- Setting the Administrator Information
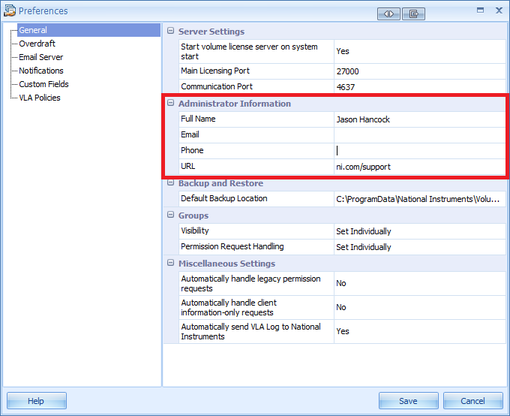
NI VLM 3.0 & 3.1 Preferences - Administrator Information
For VLM 2.1.1 and earlier
- Select the Options»Preferences menu item.
- Select the Administrator tab.
- Complete the Name, Phone, Email, and URL fields.
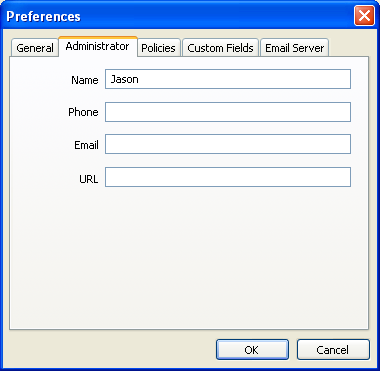
NI VLM 2.1.1 Preferences - Administrator Information
Set Overdraft Policies
Enable the ability to add new licenses to your Volume License Agreement (VLA).
For VLM 3.0 and VLM 3.1
- Configuring Overdraft
- Setting Overdraft Policies
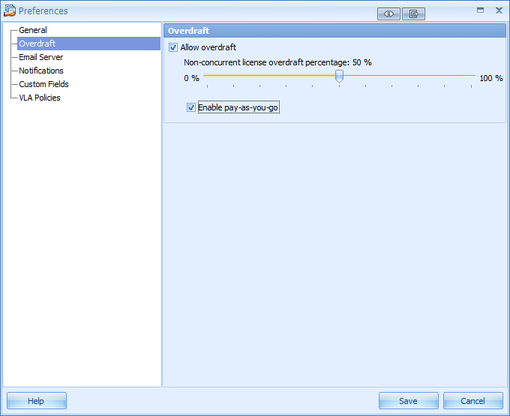
NI VLM 3.0 & 3.1 Preferences - Overdraft
For VLM 2.1.1 and earlier
- Select the Options»Preferences menu item.
- Select the Policies tab.
- Check Allow Overdraft if you want to allow overdraft. This setting applies to all products in your license file, except when specified. Note: This setting does not apply to products in your volume license agreement that use concurrent licenses.
- Check Enable Pay-As-You-Go if you want to enable pay-as-you-go. This setting reminds you when you overdraft to send an email to services@ni.com in order to cover the overdraft by purchasing the corresponding licenses.
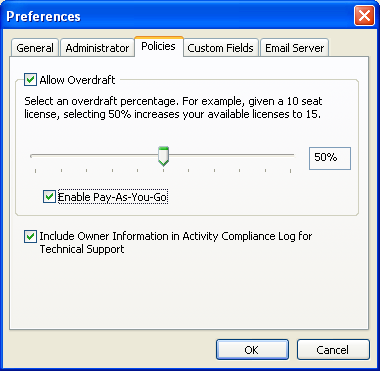
NI VLM 2.1.1 Preferences - Overdraft
Enable Technical Support for End Users
Check this box to add end user information to the Activity Compliance Log. Only end users included the Activity Compliance Log are eligible to contact NI for technical support.
For VLM 3.1
This setting is automatically enabled.
For VLM 3.0
- Select the Tools»Preferences menu item.
- Select the General tab.
- Under Miscellaneous Settings, ensure that Include client information in activity compliance log is checked.
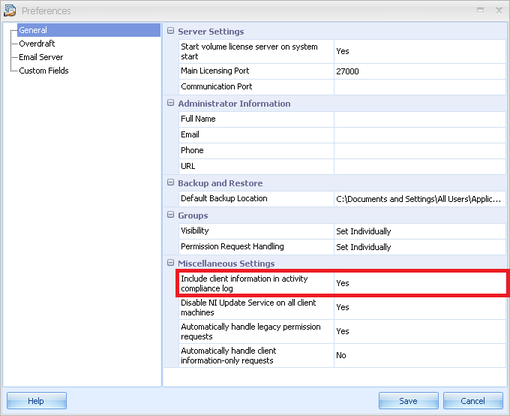
NI VLM 3.0 Preferences - Miscellaneous Settings
For VLM 2.1.1 and earlier
- Select the Options»Preferences menu item.
- Select the Policies tab.
- Ensure that Include Owner Information in Activity Compliance Log for Technical Support is checked.
.png)
NI VLM 2.1.1 Preferences - Policies
Configure Custom Fields
Configure custom fields to store information about end users and computers.
For VLM 3.0 and VLM 3.1
- Configuring Custom Fields
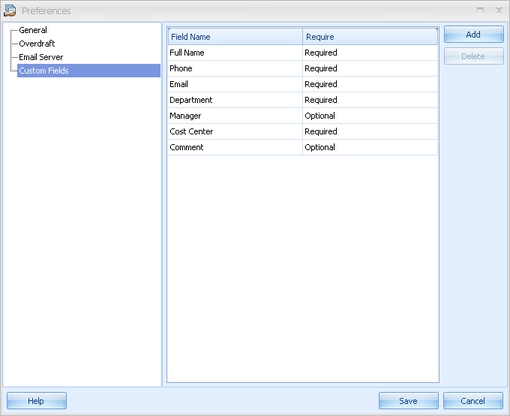
NI VLM 3.0 & 3.1 Preferences - Custom Fields
For VLM 2.1.1 and earlier
- Select the Options»Preferences menu item.
- Select the Custom Fields tab.
- Add, Delete, or Rename fields as desired.
- Highlight any field and click Require to select whether the field is required or optional.
- Note: All fields are optional when you add a computer or user from within NI VLM, regardless of this setting.

NI VLM 2.1.1 Preferences - Custom Fields
Configure Email Server Settings
Enable the ability to email disconnected license files from within NI VLM through an SMTP server on which you have an account.
For VLM 3.1
- Configuring Email Server Settings
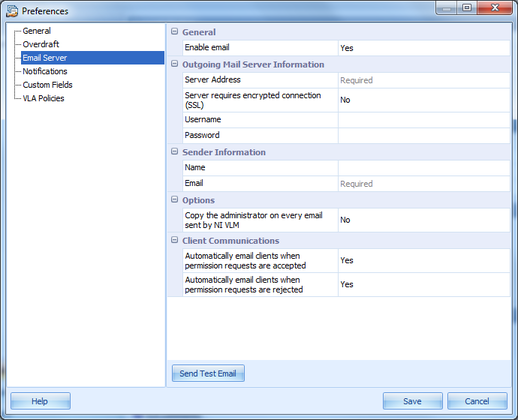
NI VLM 3.1 Preferences - Email Server
For VLM 3.0
- Select the Tools»Preferences menu item.
- Select the Email Server tab.
- Enter the SMTP server address in the Outgoing Mail Server Information box. You can optionally specify a port number, for example, smtp.example.com:465. If your SMTP server requires SSL encryption, check This server requires an encrypted connection (SSL). The default port is 25 if you are not using SSL encryption. If you are using SSL encryption, the default port is 465.
- If the SMTP server requires authentication, enter in the Login Information box the user name and password you use on your SMTP server.
- If you want to receive a copy of every email sent from within NI VLM, check Carbon copy the administrator on every email sent by NI VLM in the Options section.
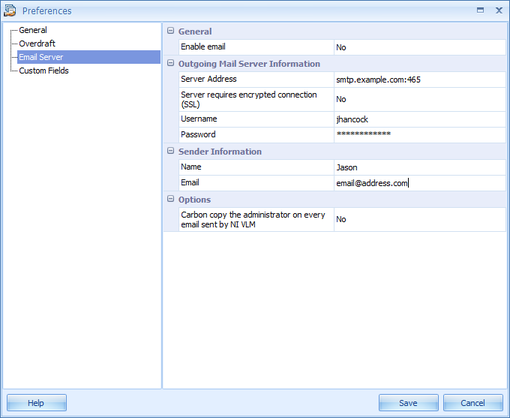
NI VLM 3.0 Preferences - Email Server
For VLM 2.1.1 and earlier
- Select the Options»Preferences menu item.
- Select the Email Server tab.
- Enter the SMTP server address in the Outgoing Mail Server Information box. You can optionally specify a port number, for example, smtp.example.com:465. If your SMTP server requires SSL encryption, check This server requires an encrypted connection (SSL). The default port is 25 if you are not using SSL encryption. If you are using SSL encryption, the default port is 465.
- If the SMTP server requires authentication, enter in the Login Information box the user name and password you use on your SMTP server.
- If you want to receive a copy of every email sent from within NI VLM, check Copy the administrator on every email sent by NI VLM in the Options section.
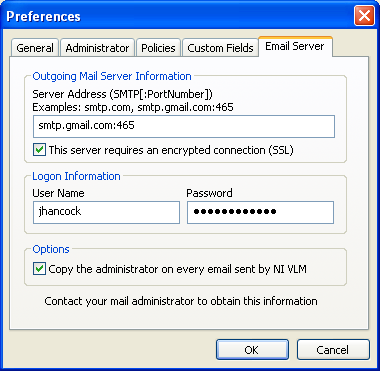
NI VLM 2.1.1 Preferences - Email Server