Requirements
Hardware
- EtherCAT Master: LabVIEW Real-Time controller with two Ethernet ports, such as NI CompactRIO, PXI, and NI Industrial Controller
- EtherCAT Slave: Supported third-party motor drive , motor, and cabling
- Ethernet cable, power supplies, and other required accessories defined in hardware documentation
Software
The table below shows the minimum requirements for most SoftMotion Drive Interface Plug-ins. However, SDI plug-ins may require later versions of LabVIEW and SoftMotion. Before installing software, open the SDI plug-in in VI Package Manager and review the specific software requirements. All SDI plug-ins are forward-compatible, so using the latest version of software available will ensure the best compatibility.
Compatible software versions, drive firmware versions, and feature lists for each SDI plug-in can be found at the following link for the latest version of each plug-in.SoftMotion Drive Interface (SDI) Plug-in Compatibility
Setting Up the Motion Hardware
For the specific steps in setting up your particular motion system, please refer to documentation from the manufacturer. This tutorial shows a simplified setup process for the Delta ASDA-A2 EtherCAT servo drive. However, the overall process for each servo drive remains the same.
- Unpack and wire the motor drive, motor, and feedback. Ensure that all signals are properly connected before applying power to the system. A typical motion system will have the following connections:
- Amplifier power, either AC or DC from a compatible power supply
- Logic power, typically 24VDC
- Motor commutation signals
- Encoder, resolver, or absolute feedback signals
- Motion I/O, such as limit switches, home switch, and emergency stop
- Install the drive manufacturer's configuration tools. Each drive manufacturer will provide software to configure the drive, tune the system, and command test moves.
- Before integrating the drive with SoftMotion, ensure that the drive is properly tuned and test moves can be executed successfully from the drive manufacturer's software.
- Ensure the drive is configured in Position Mode and set to accept EtherCAT commands. SoftMotion Drive Interface uses DS 402 with CANopen over EtherCAT (CoE) mode and does not support other profiles or communication methods.
- Configure any external I/O signals on the drive. All home and limit switches should be wired directly to the drive, configured, and tested to work before integrating with SoftMotion.
Configuring the NI Real-Time Controller
This tutorial uses an NI cRIO-9068 as the Real-Time controller and EtherCAT Master. Any NI Real-Time Controller with two Ethernet ports will be compatible with EtherCAT and SoftMotion Drive Interface.
- Follow the Getting Started Guide included with your Real-Time controller to set up the hardware, including wiring, grounding, and Ethernet connections. For example, this tutorial used the cRIO-9068 Getting Started Guide .
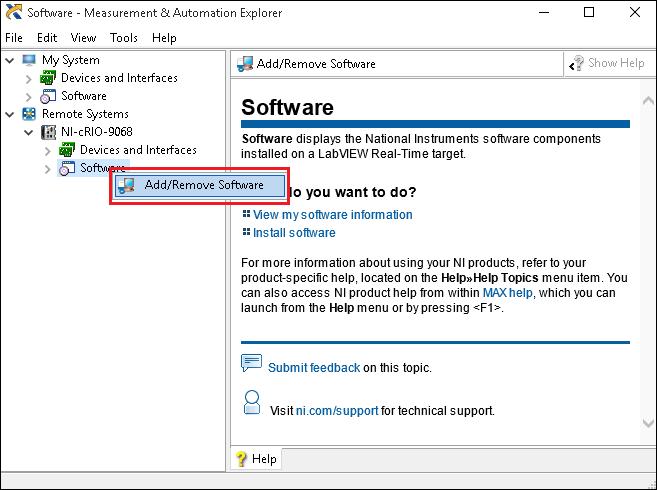
- After the Real-Time controller has been discovered in NI MAX, use MAX to install software. Expand the target under Remote Systems. Right-click Software and select Add/Remove Software.
- Select the recommended software set with the NI-RIO and LabVIEW Real Time version installed on your PC, as well as NI-Industrial Communications for EtherCAT driver software and the LabVIEW SoftMotion Module onto the controller.
- Click Next to begin the installation process. Wait until the installation is complete.
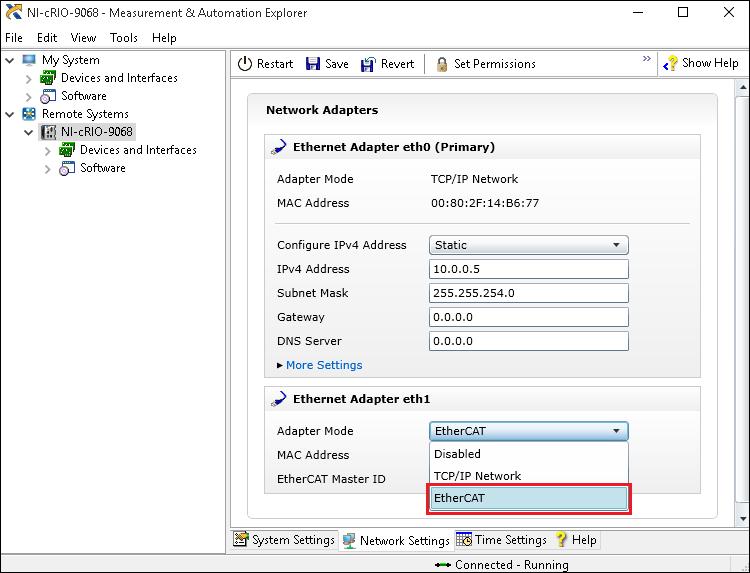
- Once the installation is complete, click on the Network Settings tab to configure the secondary Ethernet adapter as the EtherCAT master, as seen in the image below. Once EtherCAT is selected for the desired adapter, click Save to apply the settings. The Real-Time controller will restart to apply the change.
- Close NI MAX.
Installing the SDI Plug-in
SDI Plug-ins are provided as VI Packages via the LabVIEW Tools Network and VI Package Manager (VIPM). VIPM is included in the default installation of LabVIEW. The VI Package is essentially an installer that allows for version-controlled updates. Included in each SDI plug-in are the following:
- SDI Plug-in files to allow SoftMotion integration
- EtherCAT slave ESI (.xml) file modified for SDI
- Example project and VIs
Because the SDI Plug-in includes a modified ESI file, do not import the manufacturer's default ESI file into LabVIEW. This may cause the EtherCAT slave to deploy with an object mapping incompatible with SDI. Additionally, ensure that the firmware installed on your third party drive matches the firmware the SDI ESI file was written for - this can generally be found in the title of your drive's ESI file located at C:\Program Files (x86)\National Instruments\Shared\IndComECAT\DD.
This tutorial shows the setup process for the Delta ASDA-A2 EtherCAT servo drive's SDI plug-in. The process is the same regardless of the plug-in you are using.
- Open VI Package Manager, which is found in the Start Menu under All Programs >> JKI >> VI Package Manager (VIPM). You can also use Windows search using the term VIPM.
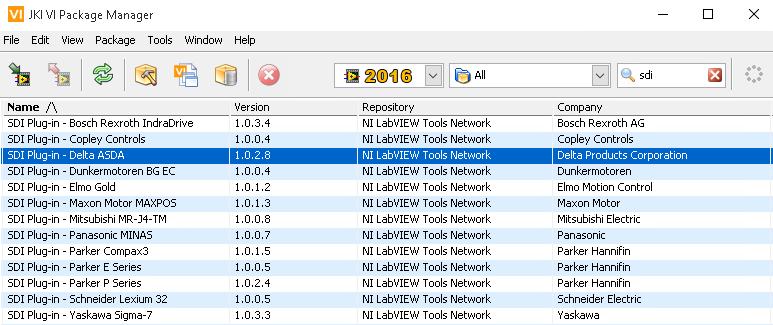
- Allow VIPM to update its list of currently available packages from the Tools Network.
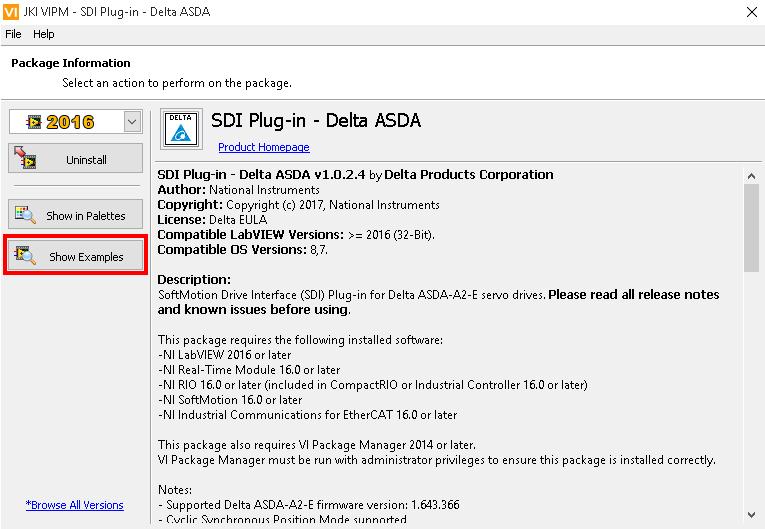
- Browse the list of packages for the servo drive you are using. In this case, double-click SDI Plug-in - Delta ASDA.
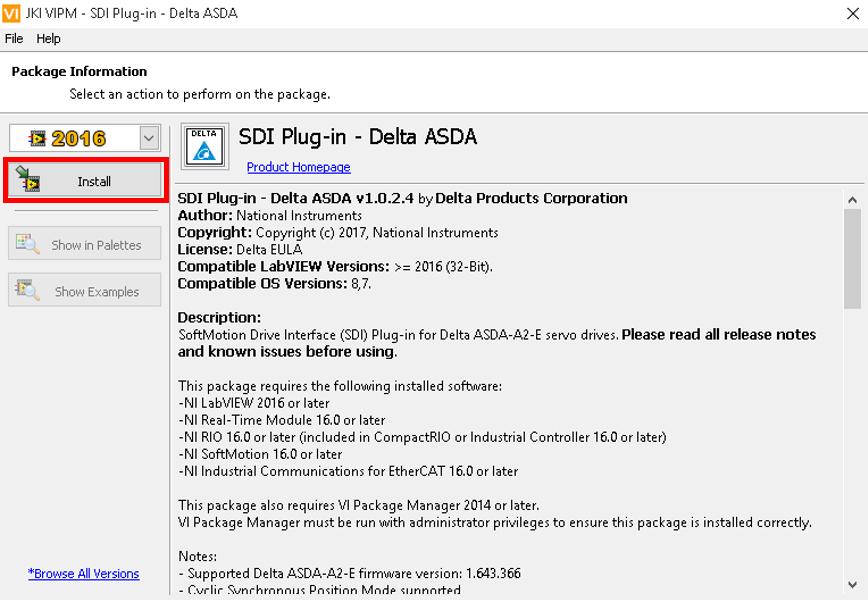
- After reviewing the minimum software version requirements and package description, click Install to begin the installation process.
- If this is the first package from VIPM you have installed, you will be prompted to accept the license agreement from JKI. Next, you will be prompted to accept the license agreement for the plug-in you are installing.
- VIPM will open LabVIEW, and you may be prompted to restart LabVIEW after installation is complete. Press OK to continue.
- Once installation is complete click Finish to close the installation window. Leaving VIPM open, restart LabVIEW.
Using the SDI Plug-in
Each SDI Plug-in should include an example LabVIEW Project that is added to the LabVIEW Example Finder. This section will explore the contents of the Example Project and show how to move the code to your Real-Time Controller.
- If VI Package Manager is still open, you will be able to open the examples by clicking Show Examples from the installation window.
- Open the VI Project file from the directory opened by VIPM. If you have closed VIPM, you can navigate to the following directory in the LabVIEW Example Finder: Hardware Input and Output > Motion Control > SoftMotion > Customizing SoftMotion > Advanced. Select the example project for the drive you are using.
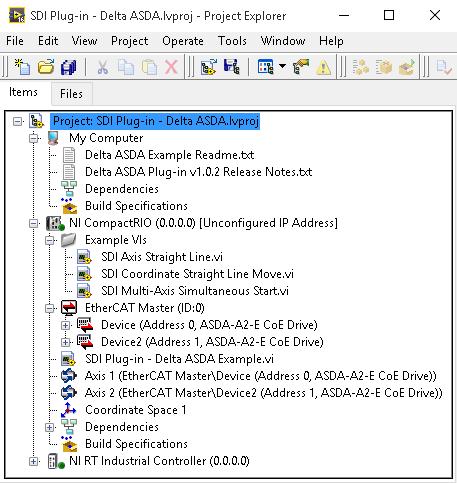
- To use your Real-Time controller with the example project, right-click NI CompactRIO or NI RT Industrial Controller and select Properties. Enter your controller's IP address or DNS name in the General tab, then click OK.
- If you are only using one EtherCAT drive, right-click Axis 2 and select Remove from Project. Repeat this process for Device2 under EtherCAT Master.
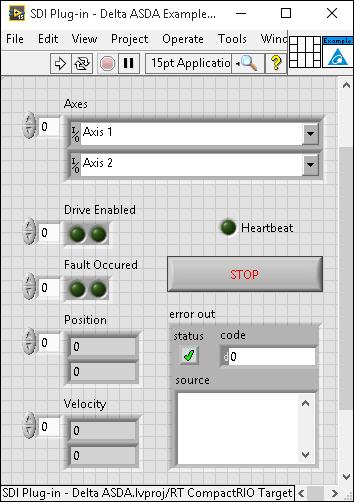
- Open the file named SDI Plug-in - [Drive Name] Example.vi from the project to begin testing the SoftMotion Axis. This VI uses the SDI Plug-in's Open.vi to load the Plug-in into memory before transitioning the Scan Engine to Active Mode. Once this is complete, the VI clears faults on the drive and enables the drive.
- If you are only using one EtherCAT drive, right-click Axis 2 in the array control and select Data Operations > Delete Element.
- Run the VI. LabVIEW will prompt you to deploy the Scan Engine settings, Axis Configuration, EtherCAT devices.
- Once the VI is running, the SDI Plug-in will be running in the background. This allows other VIs or the Interactive Test Panel to access the SoftMotion Axis bound to the EtherCAT drive.
Using the Interactive Test Panel
Once the SDI Plug-in is running, the rest of the SoftMotion API can be used to program moves for the EtherCAT drives. Before using example code, it is recommended to test the control of the drive using the Interactive Test Panel.
- After running the Example VI described in the above section, right-click the SoftMotion Axis to test and select Interactive Test Panel.
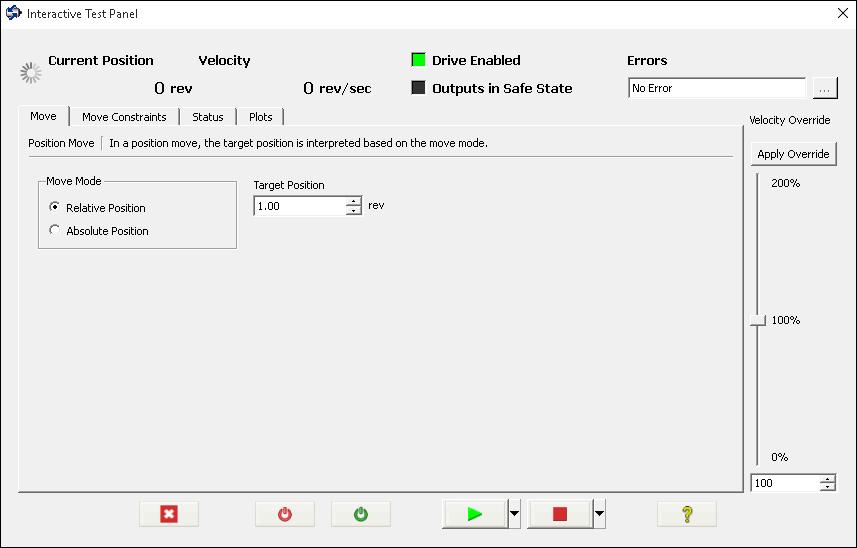
- The units in SoftMotion can be scaled to any user-specific unit. By default, SoftMotion Axes are configured without unit scaling. The Delta ASDA project has been configured as 1,280,000 counts per revolution to match the default scaling of the drive. Right click on the SoftMotion Axis and use the Encoder tab to change the position scaling by setting the number of counts per desired unit.
Note: If you are unsure of the unit scaling, use the Interactive Test Panel to monitor the Encoder Position value if you are able to move the drive manually while it is disabled. - The Interactive Test Panel lets you enable and disable the selected drive, command single-axis moves, and monitor position and motion I/O. Use the Move Constraints tab to ensure that velocity, acceleration, and deceleration values are acceptable for your motion system before performing a move.
Exploring the SoftMotion API
Once the system has been tested using the Interactive Test Panel, you can begin exploring the rest of SoftMotion's API. The SDI Plug-in provides three example VIs that are adapted from SoftMotion's API examples to get started.
This folder of three VIs (Axis Straight Line, Coordinate Straight Line, and Multi-Axis Simultaneous Start) does not require that the SDI Plug-in - Delta ASDA Example.vi is running. Each VI performs the following:
- Opens the Plug-in
- Transitions the Scan Engine to Active Mode
- Enables the drive(s)
- Runs the given move
- Disables the drive(s)
- Transitions the Scan Engine to Configuration Mode
You can also use any SoftMotion example found in the LabVIEW Example Finder under the directory Hardware Input and Output > Motion Control > SoftMotion. To run these VIs, either add the Set Plugin Mode.vi as seen in the SDI example VIs or leave the primary example VI running.